


07-14/02/2007
Sadly, I have neglected to keep record of how long it took and when I was working on it.
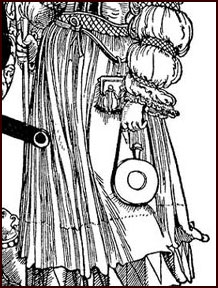
When I saw this painting I knew I had to make a yellow apron instead of white. I had some pale yellow herringbone twill linen that seemed perfect for the project.
I began by evening out one end of my fabric. I decided to follow Dorothea's advice and have the fishbone twill run vertically. Those stripes helped to make the pleats uniform.
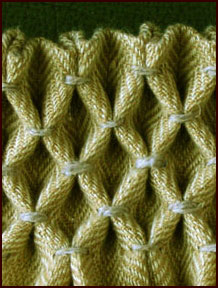
When the 150cm width was pleated, I smocked it in the honeycomb pattern using natural linen thread. When the smocking was done, I measured the length of the apron and cut it off from the main fabric.
The next step was to pleat, smock and cut the other half of the apron. Then I hemmed these two pieces and sewed the seams.
While seaming, I found that I had been about 1 cm off pleating the second piece. It worked out in the end, but I won't cut two halves of something separately ever again.
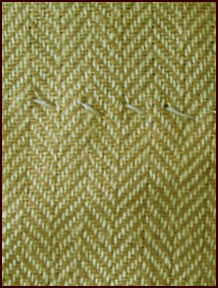
The bottom hem is extra wide and has stitches visible on the outside. I followed the woodcut above as a guide. You can clearly see that there are stitches about 10-15 cm up from the bottom of the garment.
01/03/2006
After two weeks of procrasti- nation I made the ties and attached the waistband.
For the future:
- cut both pieces at the same time;
- make sure the pleats are the same height on both pieces.